.png)
Written with help from MinutesLink — AI meeting transcription app for video meetings.
Written with support from MinutesLink — a free AI notetaker for online meetings.
Navigate to the Integrations section in your MinutesLink dashboard by clicking on the Integrations icon in the left sidebar menu.

In the Integrations page, locate the HubSpot integration option. Toggle the switch to enable the integration.

You'll be redirected to the HubSpot connection page. Choose one of the following options:
• Click Create a new HubSpot account if you don't have an existing account
• Click Sign in to your HubSpot account to connect with your existing account.

If you have multiple HubSpot accounts, you will be prompted to select which account you want to connect to MinutesLink.

Choose the appropriate HubSpot account from the list provided.
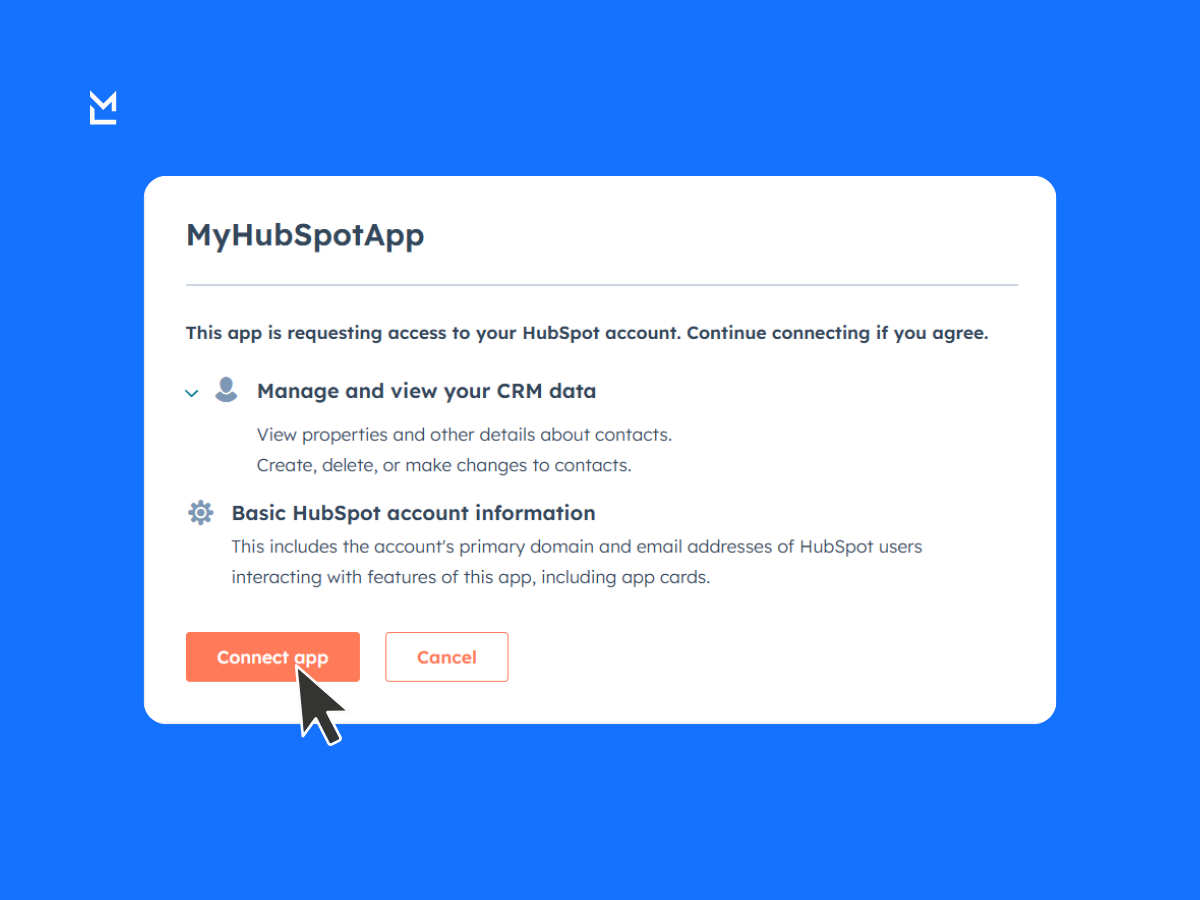
After enabling the integration, you will be redirected to a consent page. This page explains what data will be shared between MinutesLink and HubSpot.
Review the permissions requested and click Connect app to proceed with the integration.

Once the authorization is complete, you will be redirected back to MinutesLink, where you'll notice that the toggle has switched to the active position. This means the integration has been successfully completed.
To double-check, you can return to your HubSpot account. Go to Settings, then navigate to the Connected Apps section. You should now see MinutesLink listed among your connected applications.

Contacts from calls recorded in MinutesLink are automatically added to your HubSpot contacts database.
After a call is recorded in MinutesLink, the system identifies participants and adds them to the Contacts section in HubSpot with their name and email address.
This ensures your contact list stays up-to-date without manual entry.

When you open a contact card in HubSpot, you'll immediately see the call summary and transcription that MinutesLink has automatically transferred.
Meeting minutes captured in MinutesLink are associated with the relevant contacts and can be viewed directly in HubSpot without needing to switch between platforms.
However, if the conversation was long and the full transcript doesn’t fit in the HubSpot record, you’ll see a link to the complete transcript. Clicking this link will take you to the full version in MinutesLink.

In addition to syncing contacts and meeting notes, the integration automatically adds detailed call information to each contact record in HubSpot. You'll be able to see the duration of the call, email addresses of participants, as well as the exact date and time the conversation took place. This provides full visibility into each interaction and helps you keep a complete and organized engagement history.
Navigate to the settings section in your MinutesLink account, just as you would when setting up the integration initially.
Locate the HubSpot integration toggle switch in the Integrations section.
Click on the toggle switch to turn off the integration:
When the toggle is blue, the integration is active and functioning properly. When it's gray, the connection is turned off and no longer in use.
Click on the settings icon located near your profile picture in HubSpot.
Scroll down the left menu until you find the Integrations section.
Under the Integrations section, you will see several options. Select Connected Apps from these options.

You will see MinutesLink listed among your connected applications.
Click on the Uninstall button next to MinutesLink.
A confirmation window will appear asking you to confirm the uninstallation of MinutesLink. Review the details carefully, and if you're certain, click on the Confirm Uninstall button.

A confirmation window will appear asking you to confirm that you want to remove the integration.
Confirm your decision to proceed with the uninstallation.
After confirmation, another window will appear asking you to specify the reason why you are disconnecting the integration.
This feedback is optional but helps improve the service.

Once these steps are completed, the MinutesLink integration will be completely removed from your HubSpot account.
✨ Note About Your Data:
When disconnecting the integration between Minutes Link and HubSpot, all previously synchronized data remains intact in both systems. Only future synchronization will be stopped. Your existing contacts, call records, meeting notes, and other data that was already transferred will continue to be available in HubSpot.
MinutesLink automatically syncs contacts, call summaries, meeting transcriptions, and call metadata (duration, time, participants) to your HubSpot account. This helps you keep your CRM updated without manual input.
After completing the authorization process, return to MinutesLink and check if the toggle is blue — this means the integration is active. To double-check, go to Settings → Connected Apps in your HubSpot account and ensure MinutesLink appears in the list.
All data that was previously synced (contacts, call logs, notes) remains in your HubSpot account. Disconnecting the integration only stops future syncing — it doesn't delete existing data.
Yes. First, disconnect the current integration via the MinutesLink or HubSpot settings, and then repeat the setup process, selecting a different HubSpot account when prompted.
If a call is too long for the entire transcription to appear in the HubSpot contact card, MinutesLink includes a link to the full version, which opens in your MinutesLink dashboard.